Yup... I'm pretty sure it's been a month already from my last post... sorry :( but that doesn't mean that I haven't been a very busy chick! I've made several new items, it's just that I've had so many different ideas running through my head lately and so many ongoing projects all at once that the last thing I thought about doing was blogging. Well, I'm happy to say that I'm back.
Now this project is a little late, but really, it doesn't matter when you make a Christmas tree skirt now does it? And if I show you this now, you'll definitely have plenty of time to work on it for next year!
The best part about this tree skirt is that it is absolutely no sew! It's really so easy to make that there really is no excuse not to make your own! Afterall, it totally beats paying out the big bucks for one that you buy at the store!
So here's what you'll need:
Queen sized top bed sheet (I just used one of my old ones)
An old fleece blanket, or large piece of fleece
Hot glue
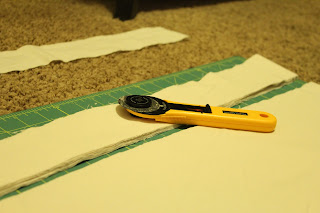
Rotary fabric cutter
First, cut out a circle in your fleece to the size that you would like your skirt to be. Now cut a small hole in the center for the tree trunk. Then cut a straight line from the center hole out to the end.
Next, cut your sheet into strips about 2" wide. If you really like a frayed look, you could try to rip your sheet into strips. I just cut mine and it still ended up fraying a little bit.
Now your ready to begin to make the skirt.
First, take your hot glue gun and squeeze out just a small line of glue on the outside edge of your skirt. Make it a nice solid line, not too thin, but also make sure it isn't in blobs.
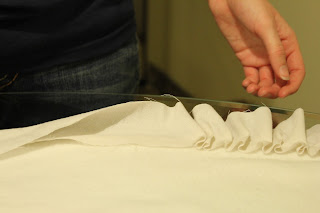
Now lay a section of your fabric strip over the hot glue and begin scrunching the fabric together by pinching and sliding the fabric along the line of hot glue. CAUTION: This step can be very hot! Don't burn yourself!
Continue like this all the way around. When your ready to move up to the next layer, I recommend you layer over the previous layer about a 1/2" so your top edge isn't showing. It can be kinda tricky keeping the spacing of your layers even so keep a close eye on what you're doing and how it's looking as you go along.
And that is it! Seriously! No special skills needed here, just a little bit of time and patience!
Here's a nice closeup of the final product:
This would seriously be cute and fun if it was made with colored or patterned sheets as well! Just use whatever you like and/or have on hand. I just had my old cream colored sheets to work with since I didn't want to buy any at the store, but I definitely think it looks really classy!


No comments:
Post a Comment