Recently I had the opportunity to get together with a couple of my old friends from high school to work on some craft projects. In doing so, I was introduced to a place that I know could become a very dangerous place for me. It's called The Wood Connection. If you really love wood crafts and you live in the Salt Lake area, I highly recommend this place! They sell precut, unfinished wood projects that are so cute and their prices are absolutely incredible! I had a hard time deciding which one I wanted to do because there are so many, but I fell in love with the snowman!
Isn't he just so adorable?! This snowman project came with a large block for his head, a small block for his brim, a carrot nose, and a leaf... I added the ribbon, the berries, the paper and the paint.
After I had painted and assembled all the pieces of the kit, I added some scrapbook paper to the front of the leaf with a little bit of mod podge. I also took some sandpaper to rough up the edges a little bit, to give the snowman a bit of an aged look, which I love (can't really see it in the pictures, however). I then added the ribbon and bow to finish off the look of his hat. But as I got looking at him, I felt like he needed a little more. So I found some little berries in my Christmas decor and just poked them down into the bow. Now, he's perfect! Here's a little closeup:
With cute and easy projects like this, The Wood Connection could definitely be the death of me... or at least my bank account!
12/9/11
12/6/11
My latest craft
So I have literally seen these yarn wreaths all over the place on Pinterest. They are so cute and simple and can be made for nearly every holiday so it's no wonder why they are so popular! When I first saw one, I just knew that I'd have to make one. So here it is...
I love my wreath! I really feel like it adds the perfect finishing touch to outdoor facade of my house. Now I posted this mainly just to show off my spin on the Christmas yarn wreath. There are literally thousands of ways you could make your own, so I'll post just a very simplified tutorial for how I did mine.
Supplies needed: foam wreath ring, yarn, felt, hot glue gun, a couple of hours
1) Take your wreath ring and start wrapping your yarn. Since I used two different colors of yarn, I started by measuring out how wide each section would be, marking it on the ring with a pen. This ensures that the sections would be evenly sized and also that there will be an equal amount of the two different colors. My wreath was 42" round so I made 14 sections that were 3" each (7 red, 7 white) Make sure you're pulling your yarn taught as you go. To tie up loose ends, I just simply wrapped them up as I went.
2) Add felt flowers with a hot glue gun. To make your own flowers, simply cut out five petal shapes for each flower. With each petal, sew thread across the bottom in an up-down-up-down pattern. Then again to the next petal, continuing with the same thread until you have all five petals on the thread. Then simply pull the thread to scrunch up the petals together to make a flower. (I know, I know, these instructions aren't the best. I really should have taken pictures of the process, but I wasn't originally planning on blogging instructions for the wreath so I didn't...sorry. You can, however, find helpful video tutorials on this very easily)
3) Hang your wreath using a ribbon
Once again, sorry this isn't a great tutorial, but this project is really easy anyways, just give it a try and you'll be able to figure it out. I hope I may have at least given you an idea. In the future I'll be sure to take more photos :)
I love my wreath! I really feel like it adds the perfect finishing touch to outdoor facade of my house. Now I posted this mainly just to show off my spin on the Christmas yarn wreath. There are literally thousands of ways you could make your own, so I'll post just a very simplified tutorial for how I did mine.
Supplies needed: foam wreath ring, yarn, felt, hot glue gun, a couple of hours
1) Take your wreath ring and start wrapping your yarn. Since I used two different colors of yarn, I started by measuring out how wide each section would be, marking it on the ring with a pen. This ensures that the sections would be evenly sized and also that there will be an equal amount of the two different colors. My wreath was 42" round so I made 14 sections that were 3" each (7 red, 7 white) Make sure you're pulling your yarn taught as you go. To tie up loose ends, I just simply wrapped them up as I went.
 |
| Here's a good look at the felt flowers |
3) Hang your wreath using a ribbon
Once again, sorry this isn't a great tutorial, but this project is really easy anyways, just give it a try and you'll be able to figure it out. I hope I may have at least given you an idea. In the future I'll be sure to take more photos :)
12/3/11
Cute Christmas Decor!
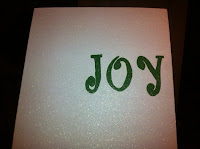
These past few days I have been working on some cute Christmas signs and I am so excited to be finished so that I can finally share them... I am so proud! Now normally I'm not great at coming up with my own ideas. I'm good at copying ideas that I've seen and tweeking them to make them a little more personal, but nothing original. This time, however, the idea was completely my own- you may have seen something similar, but I haven't so I feel I can actually claim true personal creative credit for this one! So here they are, my own fabulous additions to my Christmas decor! Love them!
Although I am so proud of my originality, I love to share my ideas and I'd love to be the inspiration for someone else's creativity instead of it always being vice-versa. So I'll share with you just how I made them in hopes that someone else out there will love them enough to make them their own as well. This project really only takes a few hours and can be broken down into less than 10 steps (or fewer if you do things a little differently- I chose the longer and harder process just because of what I had, and didn't have, at the time I started).
Supplies needed: canvas, paint and paintbrush/or vinyl letters, ribbon, glitter spray, glue
- Step 1:Paint your entire canvas white. I did this just because there was some imperfections on my canvas and I also wanted it a little whiter, so you could skip this step if you're happy with the appearance of your canvas.
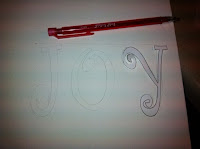
- Step 2: Hop on the computer and find a font that you like. Now create your words using the Word Art function on Microsoft Word. Print it.
- Step 3: Cut out your words, letter by letter- a long and tedious task!
- You could completely skip these last two steps by getting some wood letter from the craft store. Highly recommended if you are short on patience or time! Then you could also skip to step 5.
- And if you have access to making your own vinyl letters you can actually skip straight to step 6.
- Step 4: Lightly trace your letters onto the canvas with a pencil.
- Step 5: Paint your letters. This is where some painting skills can come in handy. I have none, however, so if I could do it, you could do! Also I recommend using a paintbrush with a nice straight edge!
- If you bought wood letters, painting them is a lot easier because you don't have to be exact and within the lines. Let your letters dry, then adhere them to the canvas.
- Step 6 (optional): Spray your entire canvas with some glitter spray. This step is totally optional, but I love the little bit of shimmer it adds. I used a white glitter called Diamond Dust from Michaels Craft Store.
- Step 7: Add some ribbon. I cut my ribbon about an inch longer than the canvas so I could glue the ends of the ribbon to the back. Be sure to pull the ribbon taught after you glue one end before gluing the next.
- Step 8: Add a bow or any other sort of item you please. I chose a bow just because I thought they looked a little like presents, but also a Christmas flower, bells or pinecones could look cute!
- I made my own bow like this:


 |
| lay your ribbon down in a zig-zag pattern like this |
- Step 9: Attach the bow wherever you please.
- Step 10: Repeat for as many signs as you would like!
Subscribe to:
Comments (Atom)


