Although I am so proud of my originality, I love to share my ideas and I'd love to be the inspiration for someone else's creativity instead of it always being vice-versa. So I'll share with you just how I made them in hopes that someone else out there will love them enough to make them their own as well. This project really only takes a few hours and can be broken down into less than 10 steps (or fewer if you do things a little differently- I chose the longer and harder process just because of what I had, and didn't have, at the time I started).
Supplies needed: canvas, paint and paintbrush/or vinyl letters, ribbon, glitter spray, glue
- Step 1:Paint your entire canvas white. I did this just because there was some imperfections on my canvas and I also wanted it a little whiter, so you could skip this step if you're happy with the appearance of your canvas.
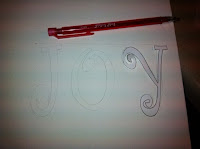
- Step 2: Hop on the computer and find a font that you like. Now create your words using the Word Art function on Microsoft Word. Print it.
- Step 3: Cut out your words, letter by letter- a long and tedious task!
- You could completely skip these last two steps by getting some wood letter from the craft store. Highly recommended if you are short on patience or time! Then you could also skip to step 5.
- And if you have access to making your own vinyl letters you can actually skip straight to step 6.
- Step 4: Lightly trace your letters onto the canvas with a pencil.
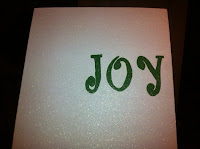
- Step 5: Paint your letters. This is where some painting skills can come in handy. I have none, however, so if I could do it, you could do! Also I recommend using a paintbrush with a nice straight edge!
- If you bought wood letters, painting them is a lot easier because you don't have to be exact and within the lines. Let your letters dry, then adhere them to the canvas.
- Step 6 (optional): Spray your entire canvas with some glitter spray. This step is totally optional, but I love the little bit of shimmer it adds. I used a white glitter called Diamond Dust from Michaels Craft Store.
- Step 7: Add some ribbon. I cut my ribbon about an inch longer than the canvas so I could glue the ends of the ribbon to the back. Be sure to pull the ribbon taught after you glue one end before gluing the next.
- Step 8: Add a bow or any other sort of item you please. I chose a bow just because I thought they looked a little like presents, but also a Christmas flower, bells or pinecones could look cute!
- I made my own bow like this:


 |
| lay your ribbon down in a zig-zag pattern like this |
- Step 9: Attach the bow wherever you please.
- Step 10: Repeat for as many signs as you would like!


No comments:
Post a Comment